Repository Template Generator

To start a new Unity package for the Reality Toolkit, use the com.realitytoolkit.upm.template repository. It is a GitHub template repository: a skeleton UPM (Unity Package Manager) package with runtime, editor and test assemblies, a docs folder, a changelog, a licence, and the three GitHub Actions workflows the Reality Collective uses to build, test and publish every package. Its default branch is development.
The template also works for any project that needs UPM-style dependency handling, not only Reality Toolkit modules. Extra account setup is needed to run the automation on your own repositories; if you do not need it, delete the
.githubfolder after creating your repository.
Before you start
- A GitHub account with access to the
realitycollectiveorganisation, or your own account if you are creating a personal package. - The Unity version the template targets: it ships with
"unity": "2021.3"inpackage.json, so use that version or later. - PowerShell, to run the initialisation script (Windows 11 includes it; run
powershellfrom a command prompt). - Optionally, an existing Unity project to develop the package in, for example the Collective's
RealityToolkit.devproject.
Step 1: Create the repository from the template
On the template repository page, click "Use this template", or start a new repository on GitHub and choose com.realitytoolkit.upm.template as the "Repository template".

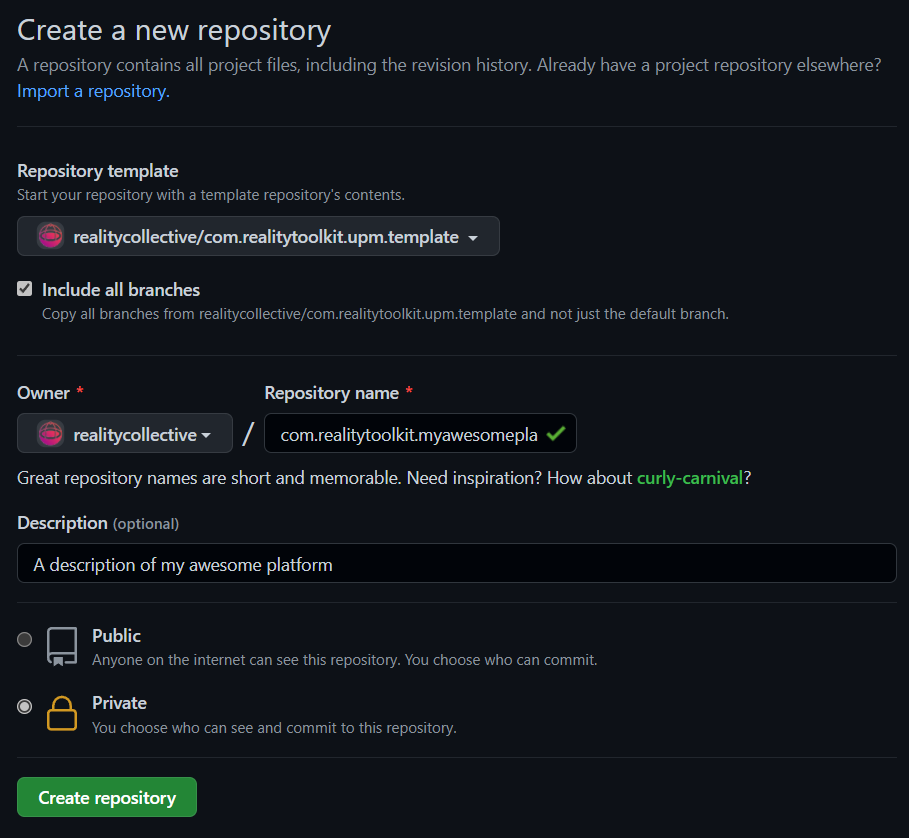
Tick "Include all branches" before clicking "Create repository", so development and main are copied along with the workflow files.
Step 2: Clone the repository and place it in a Unity project
Clone the new repository locally. To develop and test it, copy or clone it into the Packages folder of a Unity project such as RealityToolkit.dev, as a plain folder rather than a git submodule for now. Keeping it a plain clone at this stage avoids submodule overhead while you are still resolving meta files and generation issues; once the first build succeeds you convert it to a submodule (Step 10).
Step 3: Run the initialisation script
Open a PowerShell window in the cloned folder and run InitializeTemplate.ps1 with the name of your new package, for example:
.\InitializeTemplate.ps1 myawesomeproject
Pass only the project name; the script fills in everything else, and sub-names such as myawesomeproject.extension are allowed. It replaces every UPMTEMPLATE placeholder (and its case variants) in the .json, .cs, .md and .asmdef files, replaces the placeholder GUID in the C# sources, and renames the files and folders that contain UPMTEMPLATE, including the file under Documentation~. The script checks for that placeholder file first, so it will refuse to run a second time on an already-initialised repository.
Step 4: Delete the initialisation script
Remove InitializeTemplate.ps1 from the repository; it is not needed again.
Step 5: Edit package.json
Check the values the script did not need to touch, and fill in the rest: displayName, description, keywords, and the dependencies block, which ships with "com.realitytoolkit.core": "1.0.0-pre.37". Add any further package dependencies your project needs, and confirm the unity minimum version is still correct for what you are building.
Step 6: Edit the workflow dependencies
Open .github/workflows/development-buildandtestupmrelease.yml. Its Run-Unit-Tests job passes a dependencies input to the reusable build workflow, pre-filled with the Collective's build tools:
dependencies: '{"development": "github.com/realitycollective/com.realitycollective.buildtools.git"}'
Add an entry for each additional package your project depends on during the build, keyed by the branch name on the dependency's repository and its git URL without the https:// prefix. See Reusable workflows for the full dependency JSON format.
Step 7: Open Unity and resolve meta files
The template ships with no .meta files, so Unity must generate them the first time the package is opened, which keeps them unique to your project. Open the host Unity project, let it import the package, and resolve any console errors.
Step 8: Check the package dependencies
Confirm the packages your code actually uses are listed in package.json's dependencies section; check the com.realitytoolkit.core package.json for the expected format.
Do not add the new package as a dependency in the host Unity project's manifest. Dependencies belong only in the package's own package.json.
Step 9: Close Unity and push
Close the Unity project, then push the changes to the development branch of the new repository.
Step 10: Watch the build, then convert to a submodule
Open the "Actions" tab and confirm the "Build and test UPM packages" workflow runs and passes; fix anything it reports. Once it is green, delete the local plain-cloned copy from the host Unity project's Packages folder and re-add the repository as a git submodule instead:
git submodule add <remote_url> Packages\<full project name>
Step 11: Set the repository settings
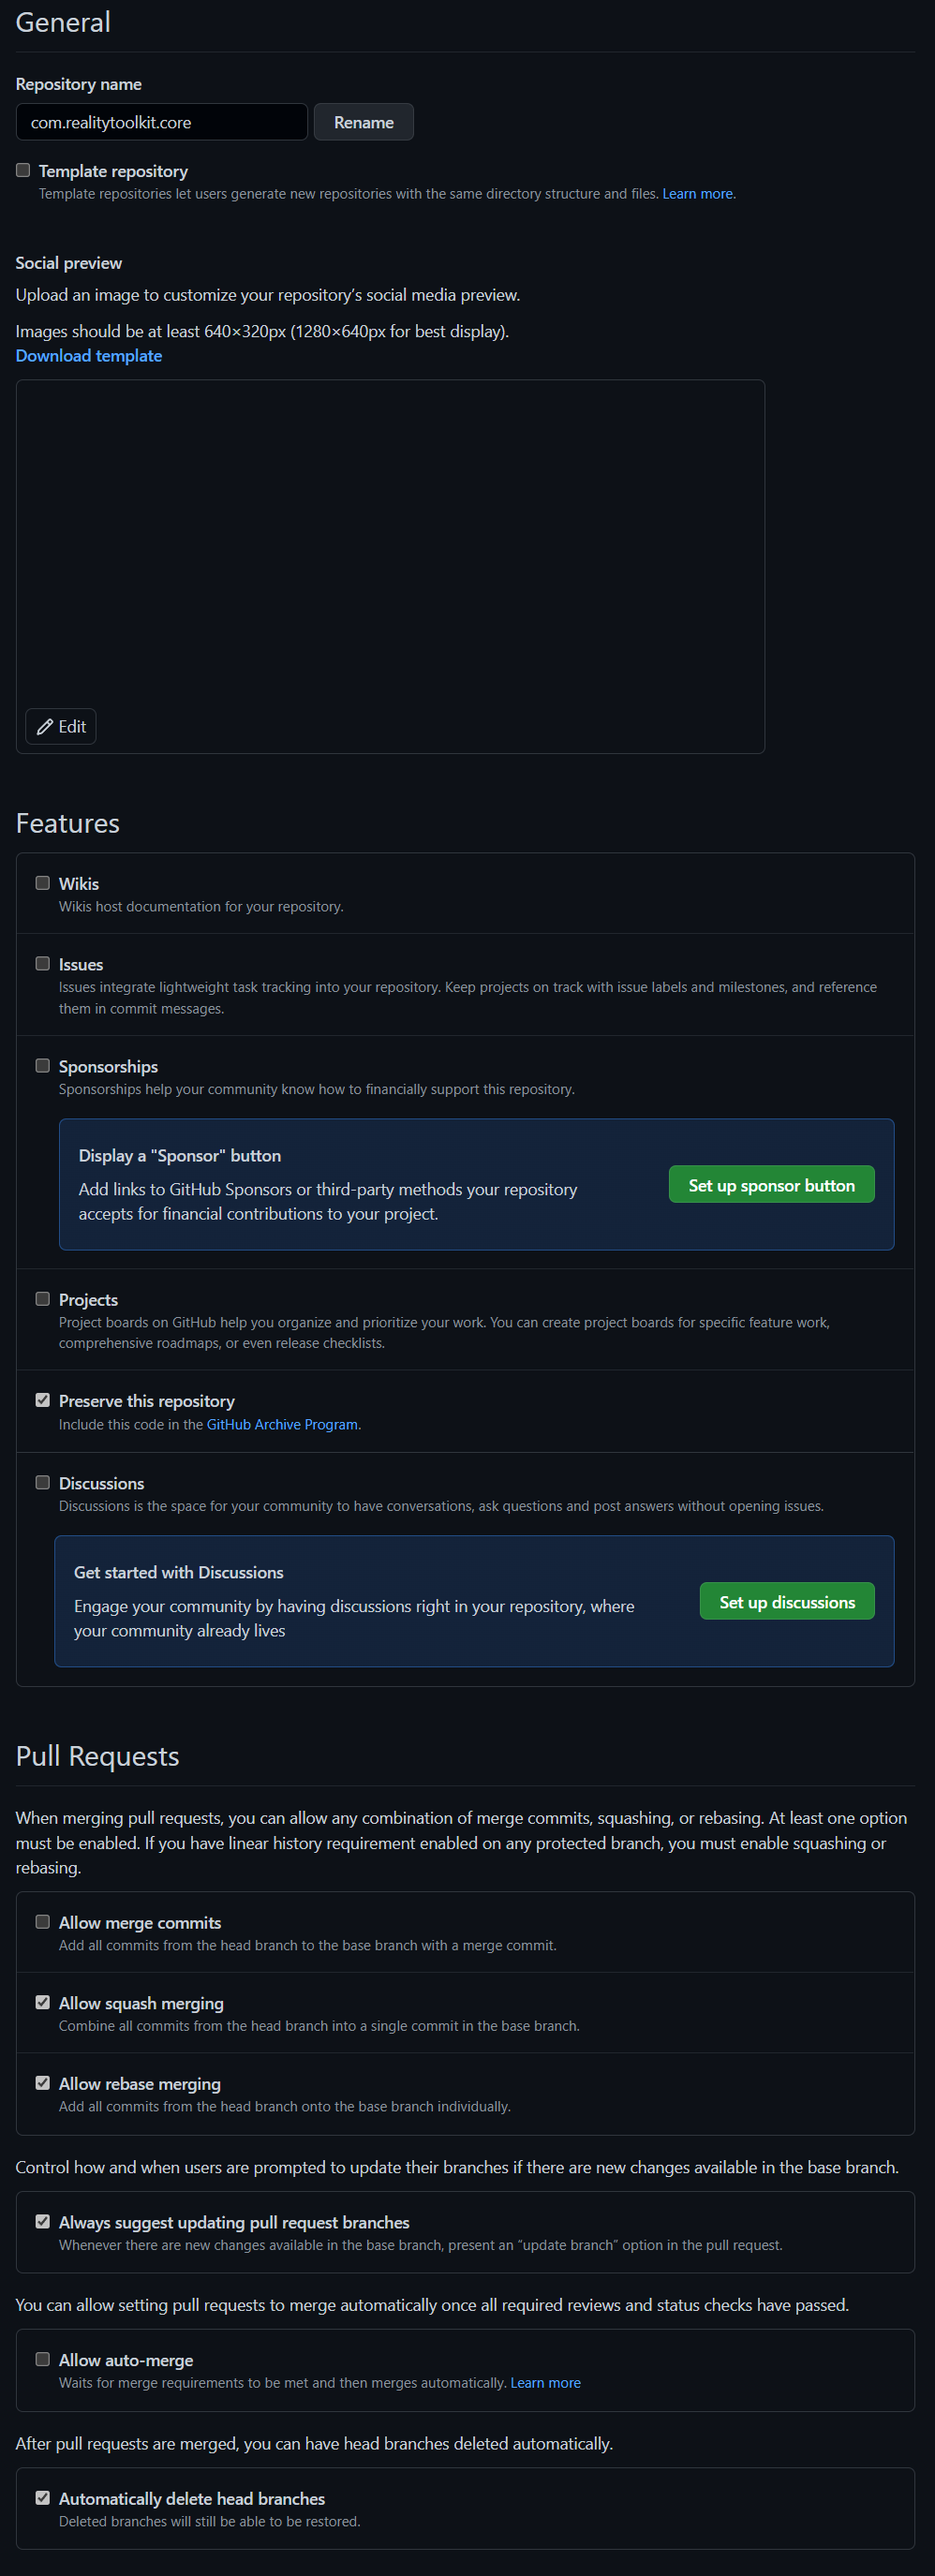
In the repository's "Settings" tab, under "General", uncheck all features (they are managed from the main RealityToolkit.dev repository), uncheck "Allow merge commits", enable "Always suggest updating pull request branches", and enable "Automatically delete head branches".
Step 12: Add branch protection
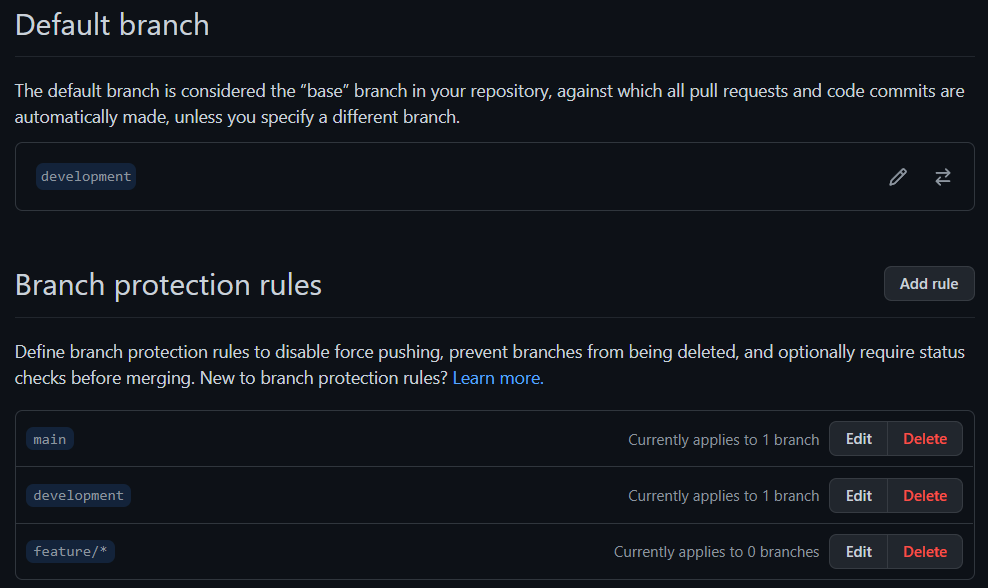
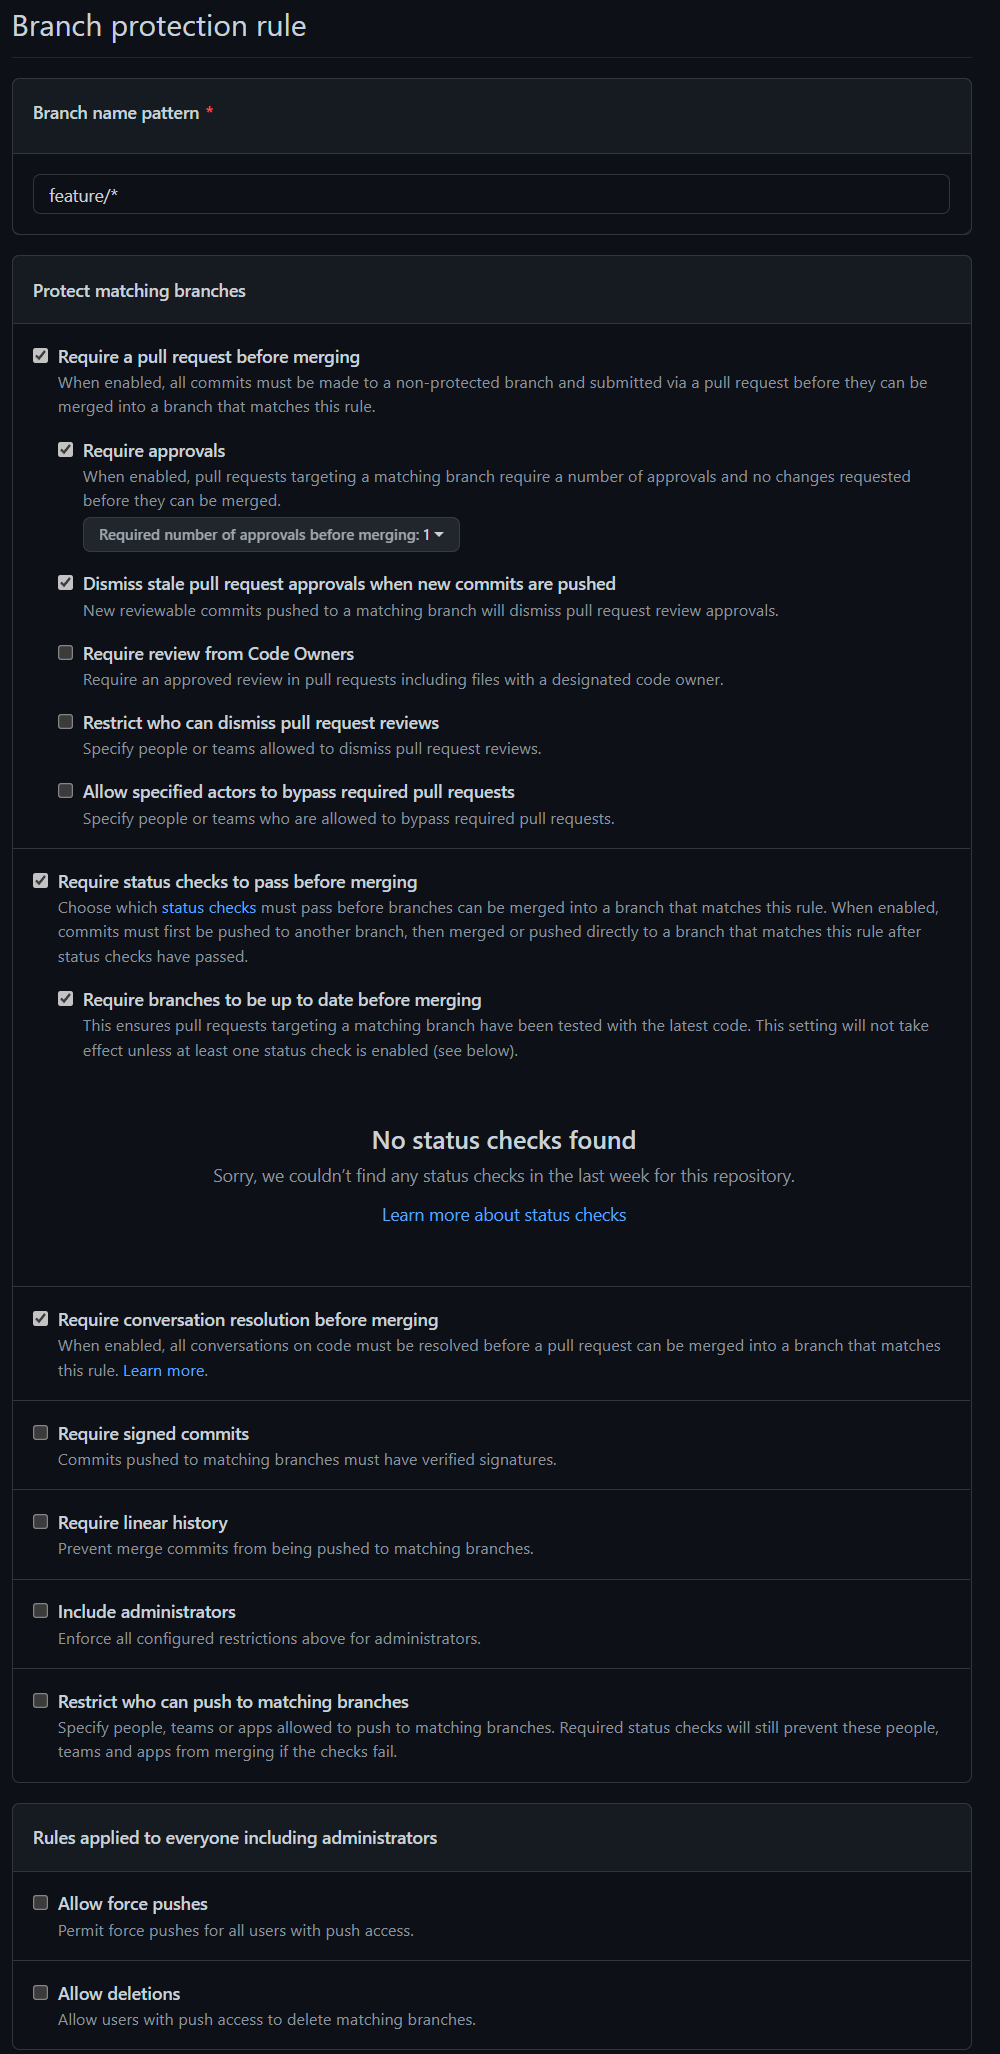
In "Branches", add protection rules for main, development and feature/*. For each, enable "Require a pull request before merging", "Require approvals", "Dismiss stale pull request approvals when new commits are pushed", "Require status checks to pass before merging", "Require branches to be up to date before merging" and "Require conversation resolution before merging".
Step 13: Tidy up
Once the first check-in has gone through, delete any failed Actions runs from earlier troubleshooting to keep the "Actions" tab clean.
What the workflows do
development-buildandtestupmrelease.yml runs on every pull request that does not target main, plus manual dispatch. It reads the minimum Unity version from package.json, checks a self-hosted runner has that version installed, then builds the package and runs its unit tests through the reusable rununityUPMbuild.yml workflow, passing the dependencies input from Step 6. A pull request cannot merge until this passes; see Setting up a GitHub build server for what the runner needs installed.
development-publish.yml runs on every push to development. It calls the reusable upversionandtagrelease.yml workflow with build-type: pre-release, so each merge bumps the pre-release version and tags a new release, which OpenUPM then picks up automatically.
main-publish.yml runs on every push to main. It looks for no-ver, minor-release or major-release in the triggering pull request's title, and defaults to a patch release when none is present, then tags the release, refreshes development from main, and bumps development to the next patch version ready for further work. See Release pipelines for the full versioning rules.
More information
- Reusable workflows, for the full list of workflows and the dependency JSON format
- Release pipelines, for how versioning and publishing work across
developmentandmain - Setting up a GitHub build server, for the self-hosted runner the workflows expect
- com.realitytoolkit.upm.template on GitHub
- OpenUPM, where published packages are listed for installation